
Adding an ADU can look straightforward on paper – a detached backyard unit, a garage conversion, or a new space for family or rental income. In Los Angeles, the adu construction process is rarely that simple. Zoning, setbacks, utility connections, structural requirements, and city review all shape the real timeline, budget, and design.
For homeowners, the biggest mistake is treating an ADU like a basic remodel. It is new habitable space, which means the project has to satisfy planning rules, building code, energy standards, and multiple inspections. A well-managed project feels organized from the start. A poorly managed one tends to stall in plan check, trigger revisions during construction, or run into avoidable cost increases.
What the ADU construction process really involves
At its core, the adu construction process moves through five stages: feasibility, design, permitting, construction, and final approval. That sounds clean, but in practice, some stages overlap. Design decisions affect permit review. Existing site conditions affect engineering. Utility capacity can influence both layout and budget.
That is why experienced contractors start with the property itself, not with a floor plan pulled from another lot. A sloped backyard in Glendale, a tight side-yard condition in Culver City, or an older detached garage in Pasadena each creates a different path forward. The smartest first step is not choosing finishes. It is confirming what can legally and structurally be built.
Step 1: Site review and feasibility
A proper feasibility review answers the questions that matter before money is spent on full plans. Can the lot support a detached ADU, attached ADU, or garage conversion? Are there access limitations for excavation or materials? Will the project require significant retaining work, foundation upgrades, or utility trenching?
In Los Angeles-area neighborhoods, lot conditions vary more than many owners expect. Mature trees, alley access, hillside grading, easements, and older sewer lines can all affect scope. Setbacks may be more forgiving for some ADU types, but that does not remove the need to evaluate drainage, fire separation, privacy, and usable construction access.
This is also the stage where budget expectations should be tested against the actual property. A conversion may look less expensive than new construction, but if the existing slab is compromised, the framing is undersized, or the structure was never built to support habitable use, the savings can narrow quickly.
Step 2: Design and planning
Once feasibility is confirmed, the project moves into design. This includes layout, exterior appearance, structural planning, and code-driven details such as ceiling heights, egress, insulation, ventilation, and Title 24 energy compliance.
Good ADU design is not only about fitting a kitchen and bathroom into a compact footprint. It is about making the space feel livable while staying inside budget. Window placement, storage, natural light, privacy from the main house, and utility routing all matter. A well-designed 500 to 700 square foot unit can feel generous. A poorly planned one can feel cramped even at a larger size.
This phase usually involves architectural drawings and, depending on the project, structural engineering and soils or grading input. Garage conversions often need careful structural review, especially when the original building was never intended as conditioned living space. Detached new-build ADUs can require more extensive foundation and framing documentation.
For homeowners who want reliable pricing, this is also when scope should become specific. Vague plan sets often lead to vague bids. Clear plans produce clearer numbers and fewer surprises.
Step 3: Permits and plan check
Permitting is where many ADU projects lose momentum. The city may review planning, building, structural, mechanical, electrical, plumbing, and energy components. If plans are incomplete or inconsistent, corrections are issued and the review cycle gets longer.
The adu construction process moves faster when permit strategy is built into the project from the beginning. That means preparing plans that reflect current local requirements, coordinating consultant documents correctly, and responding to plan check comments without delay. In Los Angeles and surrounding cities, timelines can vary based on jurisdiction, backlog, and the complexity of the site.
Homeowners should also understand that permit approval is not a technicality. It is the framework that protects the project. Permitted ADUs are easier to insure, refinance, rent, and document during a future sale. Skipping permits or using incomplete plans usually costs more later.
Step 4: Pre-construction and scheduling
After permits are issued, the project enters pre-construction. This is where selections are finalized, materials are ordered, the build sequence is organized, and site logistics are planned. Temporary protection, staging, demolition timing, and neighborhood access should all be addressed before work starts.
This stage matters because ADU construction is often performed on occupied residential properties. The main home is still functioning, and the jobsite is sharing space with daily life. A disciplined pre-construction plan reduces disruption and helps the project stay on schedule.
It is also the right time to confirm lead times. Windows, custom doors, electrical gear, and certain finish materials can affect sequencing. If ordering happens too late, crews may complete rough work and then sit idle waiting for the next phase.
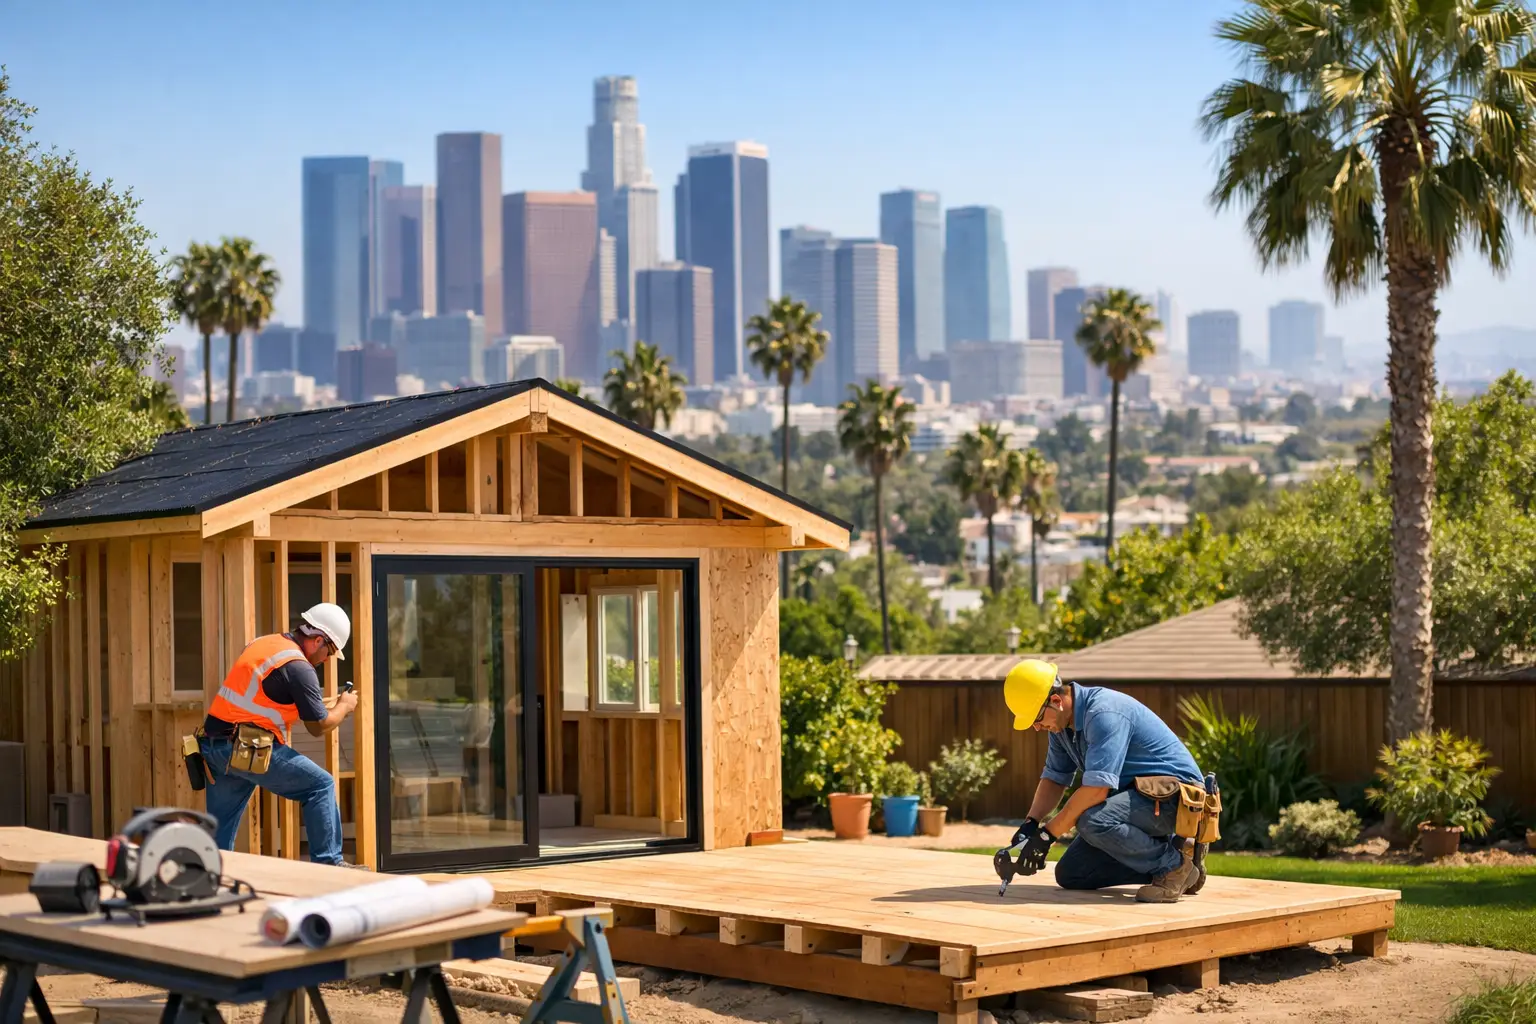
Step 5: Construction of the ADU
Construction usually begins with demolition or site clearing, followed by foundation work, framing, roofing, rough mechanicals, insulation, drywall, interior finishes, and exterior completion. The exact order depends on whether the project is ground-up or a conversion.
For detached ADUs, the early structural stages tend to be the most visible. Excavation, concrete, framing, and roof assembly establish the building quickly, but they also create many of the conditions that later inspections rely on. Precision matters here. Small layout or framing errors can create expensive downstream corrections.
For garage conversions, the hidden work is often more important than the visible transformation. Slab conditions, moisture protection, wall assemblies, and new utility lines can determine whether the finished unit performs well over time. A conversion that looks attractive on completion but was rushed behind the walls will usually show problems sooner than homeowners expect.
Throughout construction, inspection coordination is critical. Rough framing, electrical, plumbing, mechanical, insulation, and final building inspections each need to be scheduled and passed. When a contractor manages this properly, the job keeps moving. When inspections are treated as an afterthought, delays multiply.
Common cost drivers homeowners should expect
Every ADU budget has trade-offs. Size matters, but it is not the only factor. Site complexity, utility distance, finish level, structural upgrades, and drainage work can shift costs significantly.
A flat, accessible lot with straightforward utility connections will usually cost less to build on than a tight or sloped site. Likewise, a simple rectangular footprint is generally more efficient than a design with multiple offsets, complex rooflines, or high-end custom details. Homeowners in Beverly Hills, Santa Monica, or hillside pockets of Los Angeles may also face added costs tied to access, review requirements, or construction logistics.
The right question is not only, “What will this ADU cost?” It is, “What scope and level of finish make sense for how we plan to use it?” A unit built for long-term family living may justify a different investment than one designed primarily for guest use or rental flexibility.
How long the process usually takes
Homeowners often want a single number for timeline, but the honest answer is that it depends on the property and jurisdiction. Design and permitting can take several months. Construction can also take several months, with the total project duration shaped by weather, revisions, material availability, inspection timing, and site conditions uncovered after work begins.
What matters more than a fast promise is a realistic schedule. Reliable contractors build in enough time for approvals, inspections, and procurement rather than pretending everything will move without friction. That approach is less flashy, but it is far more dependable.
Choosing the right team for the ADU construction process
An ADU is not just a design exercise and not just a building exercise. It sits at the intersection of both. The strongest projects come from teams that can evaluate feasibility, prepare permit-ready plans, coordinate engineering, manage construction, and keep homeowners informed at every stage.
That is especially important in Los Angeles, where local code knowledge and permit experience can save weeks of delay and help avoid costly missteps. A licensed and insured contractor with hands-on project oversight, clear pricing, and permit and inspection management included will usually provide a more stable path than trying to assemble separate pieces on your own.
Villa Bella Construction approaches ADU work the same way it handles complex residential projects across the region – with careful planning, code compliance, disciplined execution, and straightforward communication from consultation through final walk-through.
If you are considering an ADU, the best next step is not rushing into plans. It is getting a clear read on what your property can support, what level of investment makes sense, and what kind of build team will carry the project without guesswork.